Zombie Dead Skin Tone
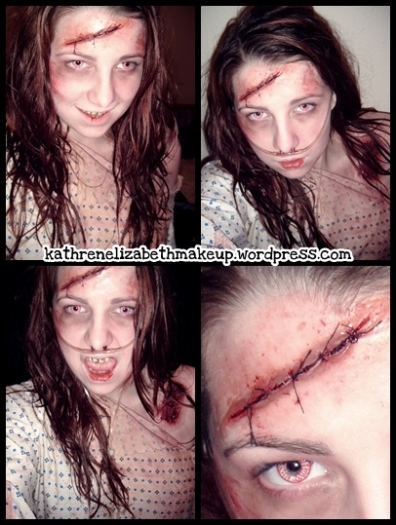
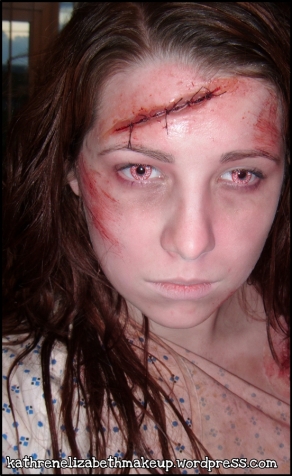
I didn’t want to create the typical white faced zombie so I decided to use beige and brown eye shadows and colour correctors to dull the skin and make it look tired, washed out and diseased.
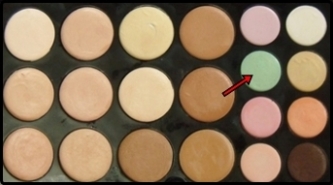
I’m naturally quite pale so I didn’t use any foundation however, I did apply a green colour corrector cream to my face as this will take out all the warmth from my skin by illuminating any redness in my skin tone.
I then used a fluffy brush to apply the beige and brown eye shadows underneath and around my eyes to create a tired ill look. I also applied a little amount of beige around my nose and lips which really helped make me look rough and haggard. I also used a darker brown pigment to hollow out my cheeks and highlight my jaw bone by using a small blusher brush to apply the colour under my cheekbones and jawline and down onto my neck. I also used the same technique to hollow out my collar bone which worked out really well.
I made sure not to conceal any dark circles or imperfections I had as they would only add to the look. For the lips a applied a skin toned foundation to pale them out ever so slightly as my lips naturally have a pinky undertone which isn’t ideal for the look I’m trying to create.
Scratches and Scrapes
To create scrapes and scratches on my face and body I used a fake blood product called Wound Filler which has a chunkier consistence than other liquid fake blood products. This product worked really well as it self-adhesive and long lasting. To apple the wound filler I used a stipple sponge (similar to the sponge I would use for pirate beards or stubble when face painting). I dabbed the sponge into the product and then dragged it across areas of my face and body to give the illusion of bloody scrapes across the skins surface.
Greasy Zombie Hair
For my hair I used gel spray, mouse and hair stray. I wanted to make my hair look dull, dirty and lifeless as zombies don’t look like they have the best hair care routine haha!
I first dampened my hair and then applied a lot of mouse and gel spray to give it that really greasy wet look. This also encouraged a natural messy wave which added to the look. This look lasted the full night but if you do see it starting to dry and not look as greasy as you’d like just add more water as this will reactivate the products you have already applied. The products I used were just cheaper brands as I was using a large amount and didn’t want to waste my favourite products when cheaper brands will do the trick for this look.
Stitched Up Laceration
https://kathrenelizabethmakeup.wordpress.com/2013/01/06/sewn-up-laceration-tutorial-derma-wax-liquid-latex/
How To Create Some Disgusting Zombiefied Nashers with Tooth Enamel
https://kathrenelizabethmakeup.wordpress.com/2013/01/07/zombie-decayed-teeth/
Create Your Own Hostpital Zombie Costume
https://kathrenelizabethmakeup.wordpress.com/2013/01/06/hospital-zombie-costume-tutorial/
Colour Vue Contact Lenses Review
https://kathrenelizabethmakeup.wordpress.com/2013/01/07/colour-vue-contact-lenses-review/
Thanks so much for reading hope you found it useful!
Any questions? please don’t hesitate to leave a comment I’ll reply ASAP =D
Katy xxx


Pingback: Sewn Up Laceration Tutorial (Derma Wax / Liquid Latex) | The Year of Halloween