Face:
Illamasqua Satin Primer – Buffed into cleansed and tones skin
MAC face and body C1 – apply lightly all over face and blend onto neck and ears
15 Concealer Palette – Subtly apply under eyes and conceal imperfections
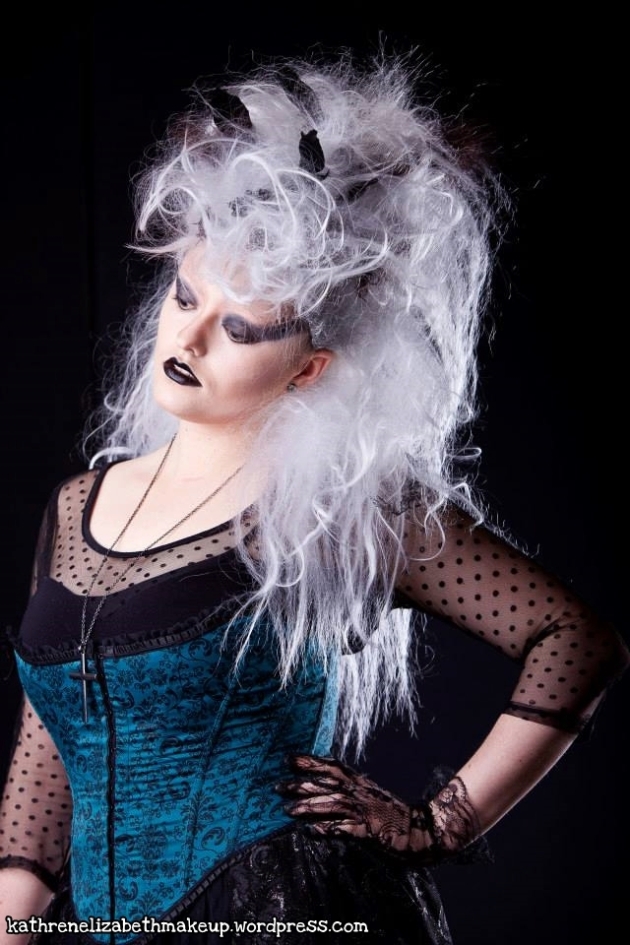
MAC Bronzer – Contour the cheeks and temples, under the jaw and down the nose to make the face more angular.
Virgin Vie powder pigment (White) – Apply to the top of the dark contour to create contrast
Illamasqua Gleam (Arora) – Dab onto the top of the cheek bones with fingers
Illamasqua Translucent Powder – Press onto skin using powder puff, staying clear of the Gleam.
Eyebrows:
Cleans and tone eyebrows to remove any grease or make-up to allow the Pritt stick to adhere to the skin better.
Apply 3-4 coats of Pritt stick to the brows powdering in between each layer.
Kryolan Greasepaint (mixture of red and white) – create a rose coloured paint and cover brows to colour correct any grey or blue tones coming through the glue. Then apply a matching skin colour over the rose tinted brows to blend with the natural skin tones.
Eyes:
Benefit Stay Don’t Stray – Applied evenly all over lids
MAC eye shadows:
Orb – Dust lightly over lid with blending brush
Virgin Vie Eye shadow (black) – Pat onto lids to create a block colour then blend outwards and under eyes with a fluffy blending brush.
Hold a strip of sequin waste over the eyes and apply Kryolan Greasepaint to create a spotted dark pattern.
Mac Gel Liner (Black track)- Apply thin line onto upper lash line to further define the eyes
Maybelline Mascara (black) – Apply to upper and lower lashes to define lashes
Lips:
Barry M (Black)- Line the natural lip line and fill in to create depth
Kryolan Greasepaint (Black)– Apply to the lips using ring finger to create a slight gloss to the lips.
Overall Evaluation:
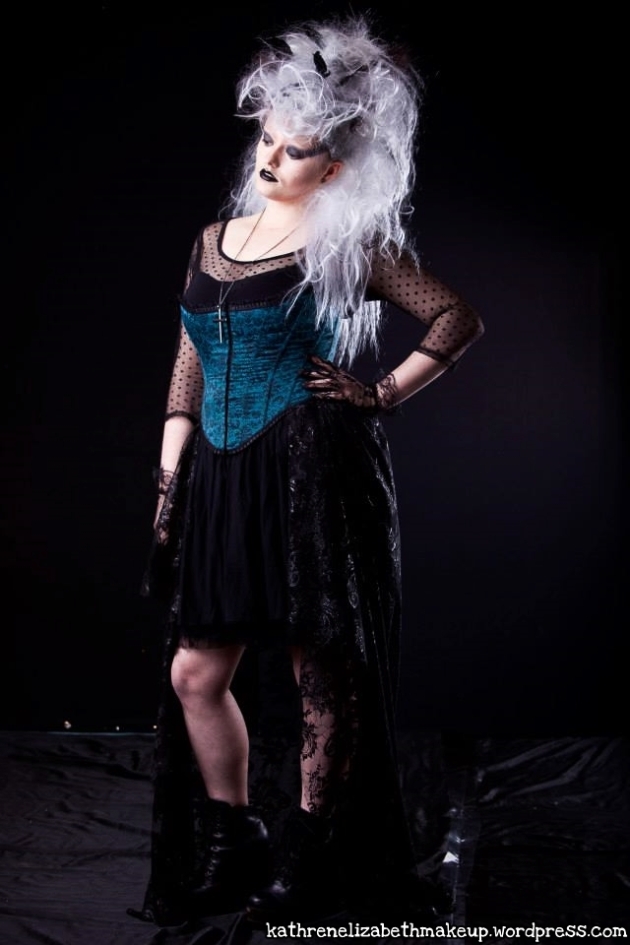
During my research into historical eras I had decided I wanted to base my fashion assessment on the 1980’s as I felt I could easily transform it into an edgy high fashion catwalk look. I began by looking into the historically correct 1980’s make-up and hair and the products they used to create the typical 80’s look. I then looked into the key fashion trends at the time to help inspire my costume ideas for the final look. To gather more inspiration to try and bring my look up to date I looked into other peoples modern interpretations of the 1980’s look to help inspire me. I created mood boards on each of these aspects as part of my design process as this is a good way of putting all the information together so I can analyse it and eventually generating my own interpretation of the 1980’s as it only has to be inspired by the 1980’s and not look exactly like the typical 80’s style.
For the design process I experimented on myself at home along with creating different face charts as another way of showing my ideas. This was a key part of my design process as it allows me to be creative and get a better understanding of what is going to look good overall. I wanted to create an extremely strong look which would be ideal for catwalk so I decided to stick with my final design which consisted of a dark smokey winged eye and a harsh black glossy lip. I also wanted to highlight and contour my models natural face shape to make her look even more striking from a distance. The dark eye was largely inspired by the 1980’s use of heavy eyeliner in winged shapes which was a very popular style at the time. This look was also inspired by the present popular catwalk looks, as I had noticed that a lot of designers were requesting that their models have their eyebrows either bleached or covered which makes the face look really edgy and different as eyebrows are a key part of framing the face. This was the first time I had covered eyebrows as part of an assessment and I am extremely happy with how they turned out as the colour correction theory I used made it easier to combat the blue tones of the hair under the glue.
On application day I was surprisingly calm as I knew exactly what I needed to do in order to execute my final look well I first wrapped my models hair make it as flat to the head as possible so the wig would fit on perfectly. Once I was happy with the hair wrap I further flattened the hair down with hairspray to prevent fly away hairs from falling down the face as these would be visible on camera. The application of the make-up went quite well as I had previously practiced this look a few times at home to ensure I was confident in my methods. After the make-up was set and complete I then went onto applying MAC face and body to my models legs and chest to make her skin look flawless and glowing so it wold pick up well on camera. I finally dressed my model and applied the wig and pinned it into place to ensure it was secure throughout the photo-shoot.
Thanks for reading 🙂
Katy x

