With it being the first day back at college I assumed we would be going through the brief or filling in any additional forms but I was wrong. We were going to get stuck in straight away which I was pleased to hear!
Yesterday we were shown how to create a face cast by Martin Hanson from Madam Tussauds (Our new part time special effects teacher). Martin is a key part of the Madam Tussauds team as he is head of the moulding and casting department. Although the wax works in Madam Tussauds are predominantly sculpted and carved by extremely talented artists the casting process is still utilised throughout the making of the wax works. Once all the measurements and pictures have been taken of the person’s face the artists are then able to begin the extremely technical process of sculpting from the measurements they have been given. Once the sculpture is complete the casting process is then used in order to aid the next process of making a wax replica of the sculpture. To read more about Madam Tussauds behind the scenes click the following link: http://www.madametussauds.com/London/About/BehindTheScenes/Default.aspx
What is a face cast?
Face casting is a technique used to create a replica of a person’s face. This task is usually carried out to create custom fit masks, SFX make-up prosthetics and is also used in the medical profession. If you would like to make you own face cast for the first time it is advised to have a professional present as it can be a very risky process as there is a possibility of blocking airways if done carelessly.
What does it feel like to have a face cast done?
Martin had asked for a volunteer to come to the front of the cast so he was able to demonstrate the life cast process. I was more than happy to volunteer as this would allow me to experience it myself so I would be able to empathise with my model to understand what she would be feeling. This would also help me to know when to reassure her keep her feeling as calm as possible. The feeling of having a life cast applied was very odd as your face feels cold then warm and then quite heavy due to the different stages of the process but you do get used to it. The key is to remain calm and relaxed and embrace the fact you are unable to open your eyes and mouth. At first I was fighting the feeling to open my eyes but by the time the rubber had set it felt totally fine. It is also important to keep your breathing calm and relaxed and DO NOT hold your breath and panic!
Products/ Tools needed:
- Mould Life Face Coat, Part A and B
- X2 Rolls of Mod rock
- Bandages
- Vaseline
- Clay
- Plaster
- Scrim
- X2 Mixing bowl
- X2 Cups of water
- Blunt sculpting tool
- Large plastic bin bag
- X2 Spatula
- Flat wooden board
- Eyebrow/eye liner pencil
Before we began we were organised into a group of three to make the process a little quicker. The reason for this is ensure the model is comfortable and to make sure you apply all the products before they set.
Firstly we had to make sure we were fully prepped before mixing and applying any products to our model. We laid out everything we needed on the table such as pre- cut strips of Mod rock around 30cm in length and 20cm strips of bandage. We also made sure we had a mixing bowl half full of warm water ready for the Mod Rock. It is vital that you notify your client about what you are going to do before and throughout the process as this can help keep the person calm as they can prepare themselves for the experience.
Once prepped, we were able to begin making the negative. First we used an eyeliner pencil to draw on a guideline to help us later on.
 We then applied a light coat of Vaseline to her eyelashes and eyebrows to prevent them getting stuck in the Mould-Life rubber as this could be painful.

Next we protected our models clothing by wrapping a large plastic sheet around her then secured it with tape to make sure it didn’t fall off. Now our model was prepped and ready to begin.
We were now able to start mixing equal amounts of both part A and part B of Mould-Life’s Face coat. To do this we took around two spatulas full and mixed them together in a mixing bowl. It is best to have two separate spatulas for this as you don’t want to contaminate one pot with the other part of the Face Coat as this will set in the tub.

Immediately we had to start applying the product to the face as it begins to set quite quickly. To do this we used a ½ inch cheap brush to roll the thick mixture down the face making sure to push to product around the face and into the eye sockets to get a true shape of our models face. We had to remember to constantly reassure our model, for example: when we were going over their mouth and eyes as this can be a strange feeling.
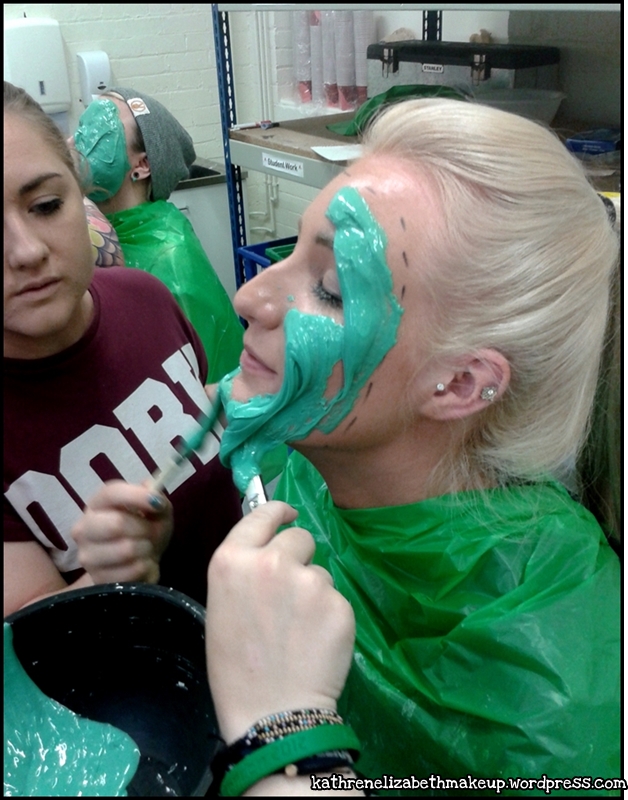
Following the guidelines we had previously drawn we started at the top of the forehead and made our way down the face. We made sure to avoid covering the nostrils at all costs as this is highly dangerous. An easy way to cover the upper lip without filling the nostril area is to pull the rubber down the bridge to then onto the upper lip as this covers the philtrum, philtrum bridge and nasal columella.
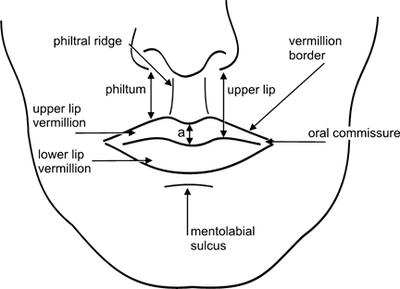
(Source of image http://dictionary.reference.com/browse/philtrum)
Once the face was completely covered in the Face Coat mixture we were the able to apply the pre-cut strips of bandage on top of the rubber.
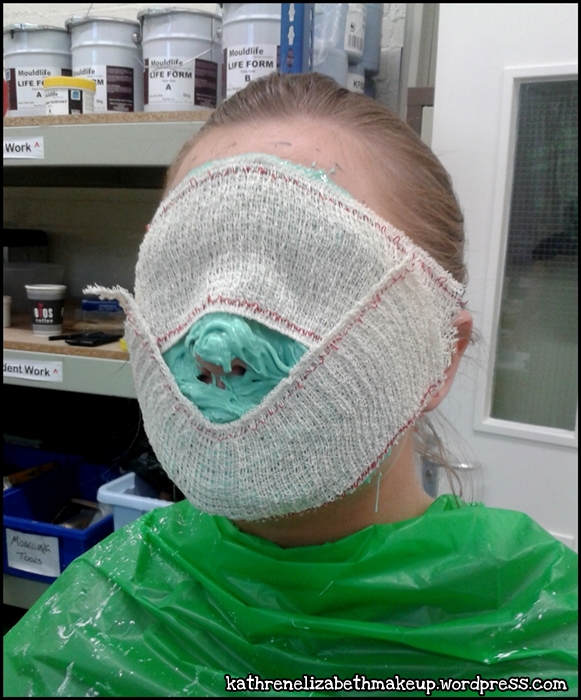
The next stage was to add the Mod Rock. To do this we dipped each individual piece of Mod Rock into the bowl of warm water. To ensure there was no excess water dripping from the Mod Rock we used our index and middle finger to squeeze the majority of it out before applying it to our models face. The reason for using warm water as opposed to cold is because it aids the setting of the plaster making it quicker.

After we had dipped a strip of Mod Rock into the water we immediately applied it to the face and smoothed it out with our hands – we still had to work quite quickly for the sake of our models comfort. At this point we thought it best to constantly reassure our model what to expect for example, “we are about to apply the Mod Rock now this may giving you a wamring sensation”.
We first started with a piece over the forehead, then a strip under the nose and chin and continued to cover the face until we had used up the two rolls of Mod Rock. Again we always had to be extremely careful when applying the Mod Rock near the nostrils to ensure our model has a clear airway.

Once all the Mod Rock was applied we then left it to set for a couple of minutes until it had cooled down considerably and turned hard. The next step is to remove the cast. To do this we used a blunt wooden sculpting tool to peel away any revealed rubber edges. We also asked our model to wriggle her face around and pull different facial expressions as this would help loosen the rubber that was set onto her face. Then that is the negative complete!
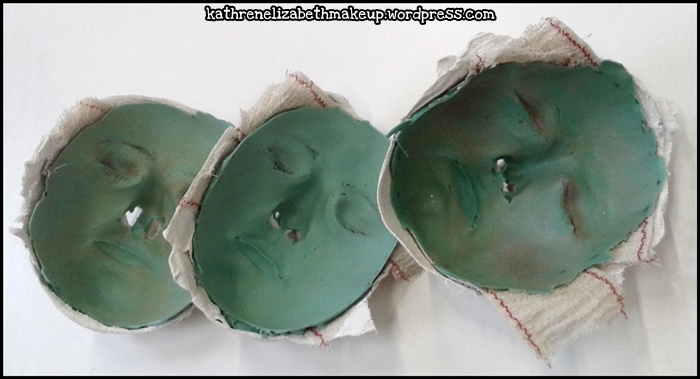

Making the Positive:
Next we have to make a positive of the cast. To do this we layer up a combination of plaster and a fabric called Scrim to add more strength. First we had to fill up the nostril area as the plaster would seep out and create a mess. To do this we blended out clay to make sure the plaster could not escape.

To secure our cast onto a wooden board used clay rolled into sausage shapes which we then placed onto the wooden board.

We then placed it Mod Rock side down and moulded the clay around it to make sure the nose would not be damaged by the board.
Next we cleaned away any make-up residue or excess oil from the inside of the cast as this would repel the plaster making the next step difficult. We then applied Vaseline around the edges of the cast were the plaster and bandages were showing. This would help is remove the positive at the end.

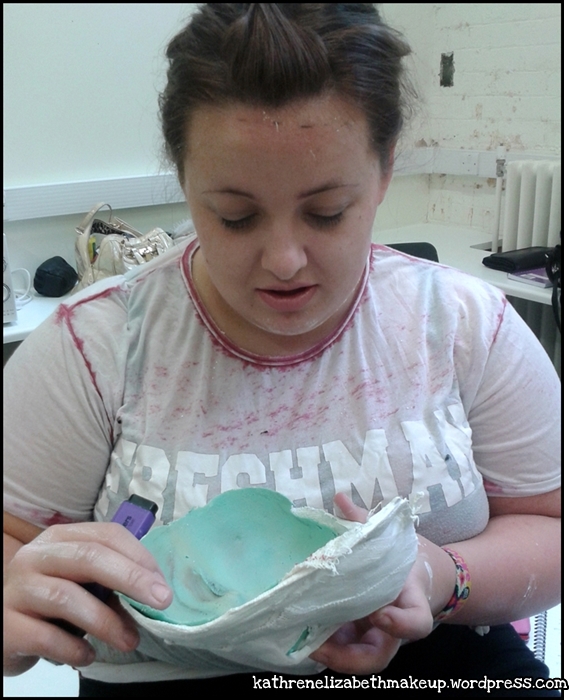
Next we mixed up the plaster. To do this we began by adding a cold cup of water to a mixing bowl then gradually sieved handfuls of plaster on top of the water until the surface had the look of wet sand. We then left it to stand for a few seconds and then mixed it with our hands to make sure there were no lumps or air bubbles as this will affect the quality of the positive.
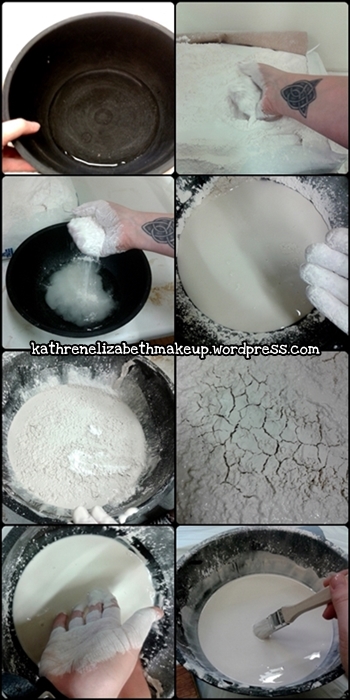
Once we were happy with the consistency of the plaster we were then able to begin to paint the plaster onto our cast using a ½ inch brush. This was difficult at first as the plaster was repelling a little but with patience we managed to get a good thick coat. We then left it to dry for around 30 minutes.
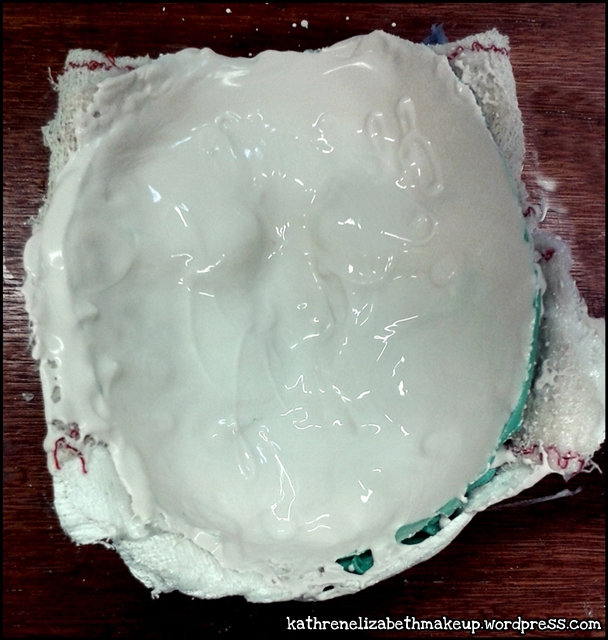
Next we used a wet brush to moisten the surface of the plaster layer we had just applied with would help the second layer adhere. The plaster we had used previously had hardens so we had to repeat the plaster mixing process to get a fresh batch. The second layer of plaster was much easier to apply as the plaster did not have to try and stick to an oily surface. This time we added another material before allowing this layer to set. We added four small squares or Scrim and then pasted another layer of plaster over the top to make sure it was tucked into all the curves of the face.

We then left that to dry for a further 30 minutes to dry completely before gently removing the plaster cast with a metal pointed tool.

The end result at this stage:

Evaluation:
I was nervous at first as face casting can be quite dangerous however we had a professional present at all-time which was extremely helpful and made us all feel a little calmer. Creating a face cast is quite a daunting thing as the person who you are casting is blind throughout the process and has to confide in you at all times. If I was to do this face cast again I would perhaps me more patient as I found it quite frustrating when the later of plaster was repelling from the rubber next time I will try to clean up the rubber better perhaps use a light toner to remove some of the excess oil.
I am really glad I have had a chance to learn how to apply a face cast as it is such a vital part to creating a custom fitted prosthetic. Having a prosthetic that fits perfectly is key to making a realistic looking make-up. I have been looking forwards to getting stuck into the casting side of special effects as it is the basis of creating prosthetics which is what I am interested in specialising in as I hope to become a Special Effects based Make-up Artist.
Thanks for visiting my blog!
Any question? Just ask!
Katy xx
For part two of this tutorial click the following link..
https://kathrenelizabethmakeup.wordpress.com/2013/10/10/face-casting-part-2/
